How to Use a Prism to Create Stunning Light Displays?
- 211
- 98
How to Use a Prism to Create Stunning Light Displays?
- By huawei-accessories.com
- 19/02/2025
Creating stunning light displays with a prism can add a magical touch to your photography or visual presentations. A simple prism can transform ordinary light into a spectrum of brilliant colors, offering endless creative opportunities. Whether you’re a professional photographer looking to bring new dimensions to your work or a hobbyist experimenting with light, understanding how to use a prism effectively opens up a world of possibilities.We’ll guide you through the step-by-step techniques to create mesmerizing light displays, enhance your projects, and leave a lasting impression on your audience. Ready to dive into the fascinating interplay of light and glass? Let’s get started.

What Is a Prism and How Does It Create Light Displays?
Understanding the Basics of Prisms
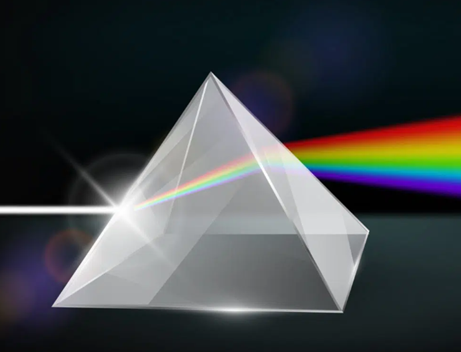
A prism is a transparent optical element with flat, polished surfaces that refract light. Typically made of glass or plastic, prisms come in various geometric shapes, but the most common is the triangular prism. When light passes through a prism, it bends, splitting into its constituent colors—a phenomenon known as dispersion.Prisms are integral in many optical devices and are widely used to demonstrate fundamental principles of light and color. Their ability to break and redirect light has practical applications in spectrographs, cameras, and periscopes.
The Science Behind Light Refraction and Dispersion
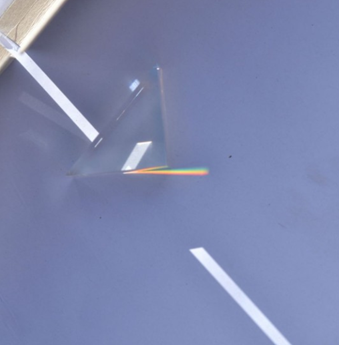
Refraction occurs when light passes from one medium to another, changing speed and bending in the process. In a prism, light enters at an angle, slowing down and bending towards the base. As it exits the other side, it speeds up and bends again. This bending causes different wavelengths of light to spread out, forming a spectrum.Dispersion is the separation of light into colors due to varying refractive indices for different wavelengths. This is why when white light, which contains all visible wavelengths, passes through a prism, it splits into a rainbow. The degree of dispersion depends on the material’s properties and the angles of the prism surfaces.
What Equipment Do You Need to Create Light Displays with a Prism?
Choosing the Right Prism
Selecting the right prism is crucial for achieving the desired light display. Opt for a high-quality optical glass prism, such as BK7 or SF11, to ensure minimal distortion and maximum clarity. Triangular prisms are excellent for straightforward light dispersion, but experimenting with different shapes like pentagonal or hexagonal prisms can yield unique effects.The size of the prism also matters. Larger prisms produce more dramatic light displays, while smaller ones might be more suitable for intricate projects or confined spaces. Consider purchasing from reputable suppliers to guarantee precision and quality.
Additional Tools and Materials
Besides the prism, you’ll need a few other materials to perfect your light displays. A reliable light source, like a LED flashlight or a direct beam of sunlight, is essential. A white surface or screen will help make the spectrum of colors more visible. For secure handling, a stand or holder can stabilize the prism, keeping it at the correct angle without your hands getting in the way.Having a camera with adjustable manual settings is beneficial for documenting your results, especially if aiming to capture the light display in photography.

How to Set Up Your Environment for Prism Light Displays?
Selecting the Ideal Light Source
Choosing the right light source is vital to creating vibrant light displays. Natural sunlight is often the best choice due to its full spectrum, providing the richest range of colors. Position your setup near a window where direct sunlight floods in. If relying on artificial light, use high-intensity sources like LED lights, which offer bright and consistent illumination.Avoid using diffused or soft light sources, as they won’t produce the sharp, clean beams necessary for the best displays.
Positioning and Background Considerations
Correct positioning of both the prism and light source is key. Arrange the prism so that it sits securely on a stable surface or a tripod. Direct your light source at one of the prism’s faces at a 45-degree angle. This setup ensures optimal refraction and dispersion.Your background can greatly influence the visibility of the light display. A plain, white surface is ideal, as it reflects the colors without interference. Consider using a dark room to reduce ambient light, which can dilute the crispness of the spectrum.Experiment with different angles and distances between the light source, prism, and background to find the setup that produces the most vivid and distinct colors.
Step-by-Step Guide: How to Use a Prism to Create Stunning Light Displays
Positioning the Prism Relative to the Light Source
1. Set Up Your Workspace: Choose a spot with minimal ambient light and a clear, white background.
2. Place the Prism: Mount the prism on a stand or ensure it’s stable on a flat surface. Aim to angle the prism’s entrance face at approximately 45 degrees to the incoming beam of light.
3. Align the Light Source: Position the light source so that it directs a focused beam onto the prism’s surface. Natural sunlight through a window or an adjustable LED torch works best.
Adjusting Angles for Desired Effects
1. Experiment with Angles: Adjust the angle of the incoming light and the prism itself. Small adjustments can result in significant changes in the display. Aim to find the angle where the light starts to disperse into a spectrum.
2. Observe the Spectrum: As you fine-tune the angles, watch how the spectrum of light moves and changes. The goal is to achieve a clean, vibrant display of colors.
Capturing the Light Display: Tips and Techniques
1. Use a Tripod for Stability: Ensure stability and reduce motion blur by using a tripod for both the camera and the light source.
2. Manual Camera Settings: Adjust the camera settings manually. Set a low ISO to reduce noise and a small aperture (high f-number) to capture sharp images.
3. Play with Exposure Times: Longer exposure times can enhance the intensity of the colors, but be cautious of overexposure.
4. Editing for Clarity: Post-process your images to enhance the colors and remove any unwanted artifacts. Adjust the contrast and saturation levels to make the spectrum stand out.
5. Background Check: Ensure there is no unwanted background noise in your photograph. A clean, white surface ensures the colors pop.
Conclusion
Creating stunning light displays with a prism is an enjoyable and creative way to explore the beauty of light and color. By understanding the science behind prisms, setting up the right environment, and following the step-by-step guide on how to use a prism, you can produce breathtaking displays. Whether for artistic pursuits, educational demonstrations, or simply a fun experiment, using a prism opens up a spectrum of possibilities.
FAQ
Can any type of prism be used to create light displays?
While many types of prisms can create light displays, the material and quality significantly influence the results. Optical glass prisms like BK7 or SF11 typically offer superior clarity and minimal distortion. Avoid low-quality plastic prisms which might not produce the cleanest dispersion of light.
Is natural light or artificial light better for prism displays?
Both natural and artificial light sources can be effective. Natural light, particularly direct sunlight, is ideal due to its full spectrum and intensity. However, artificial light sources like LED lights can also work well, especially when natural light isn’t available. Ensure the light source is focused and intense for the best results.
How can I capture prism light displays in photography?
Capturing prism light displays in photography requires a stable setup and manual camera adjustments. Use a tripod for stability, set a low ISO to minimize noise, and select a small aperture for sharpness. Experiment with exposure times to enhance color intensity, and post-process images to adjust contrast and saturation for a vivid final image.


![[VLOG interlocking report] Try the combination of Manfrotto's Nitro Tech 608 and iFootage's TC6 [VLOG interlocking report] Try the combination of Manfrotto's Nitro Tech 608 and iFootage's TC6](https://website-google-hk.oss-cn-hongkong.aliyuncs.com/drawing/article_results_9/2022/3/25/278166fcc7181b73dd99af1b87fd6482_0.jpeg)


